
Sweater Fit Part 2: Measuring yourself & reading a schematic
Part 2: Measuring yourself and reading a schematic
Welcome to Part 2 of my sweater fit series! Today we will cover measuring yourself and reading a schematic. If you missed Part 1: Gauge and Swatching, you can find it here.
Measuring yourself
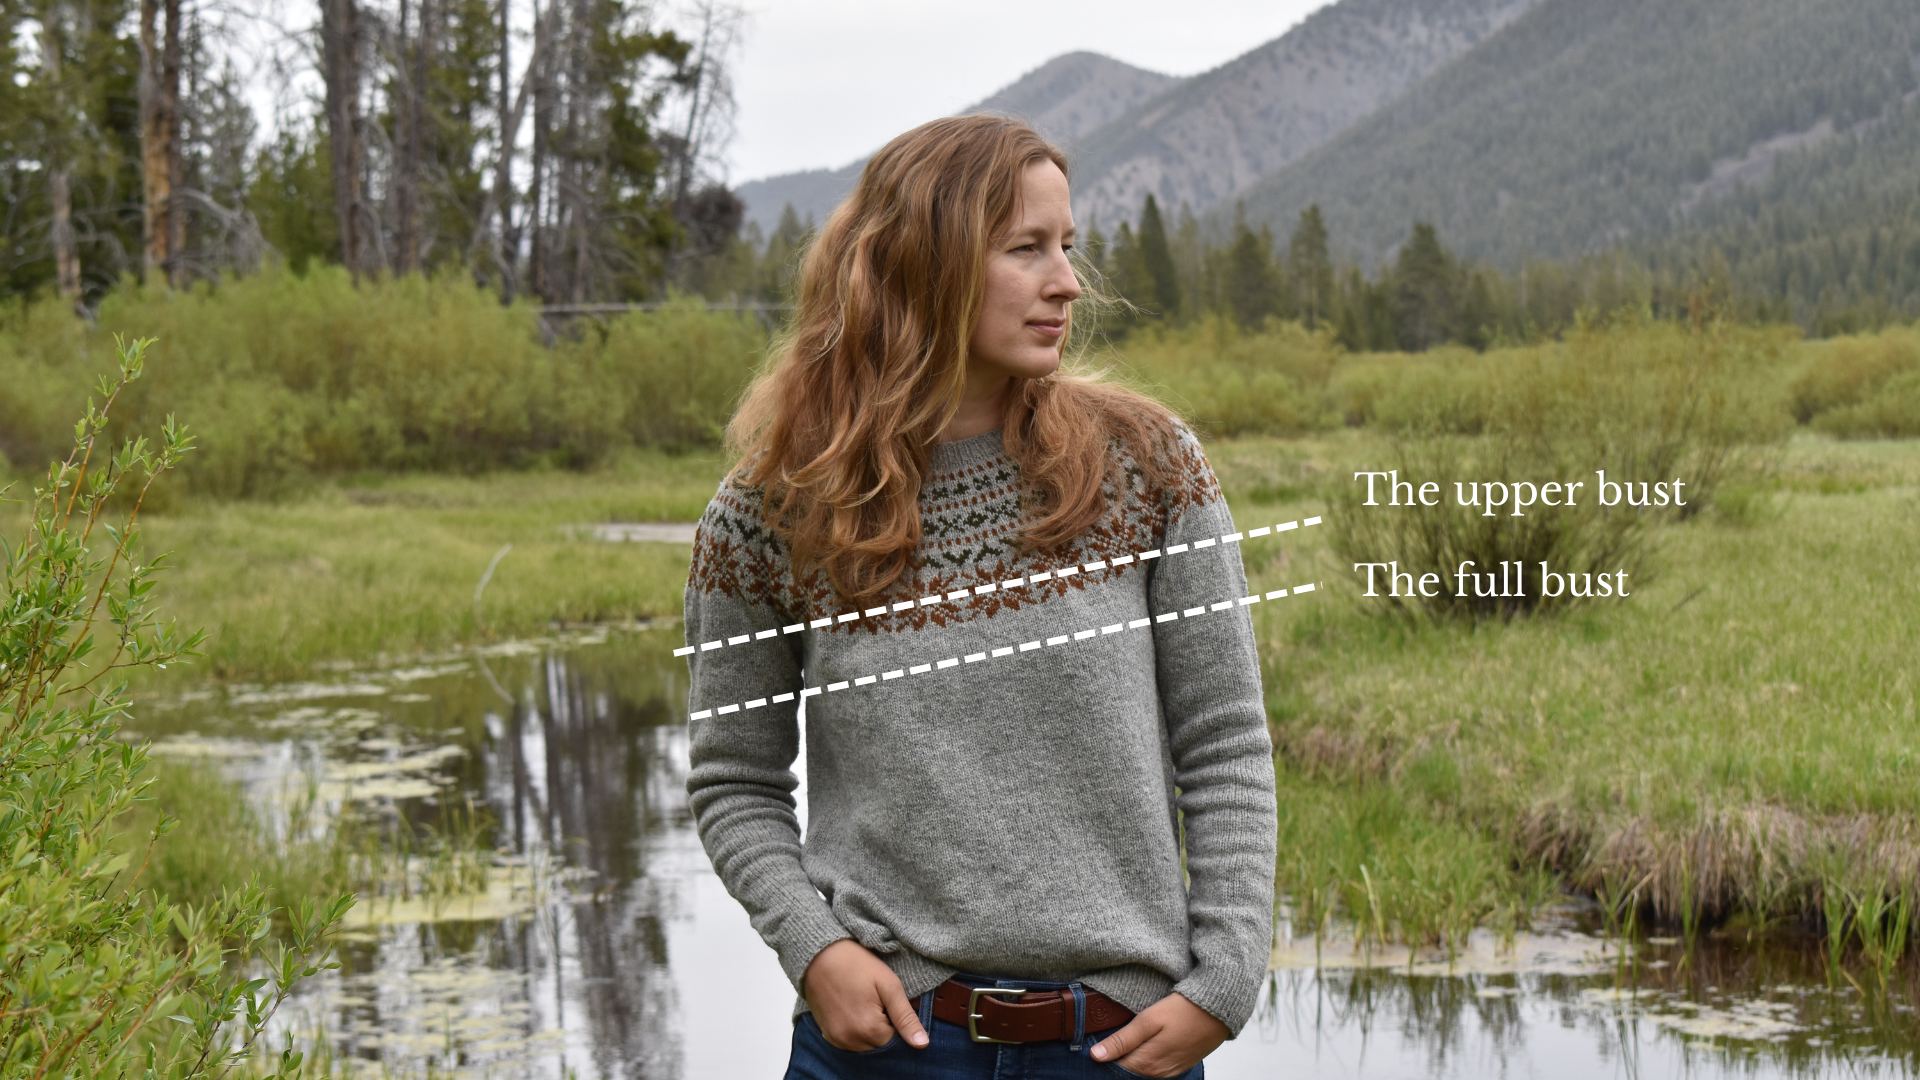
No two bodies are alike, and advice on where to measure yourself often does not consider the widely varying bust sizes women have. My advice is to take two measurements; the upper bust and the full bust. The upper bust measurement is taken around your chest right under your armpits. The full bust measurement is taken around the chest at the largest part of the chest.
Which one to use
For most women, the upper bust measurement will be the best one to go with. It is the measurement I always use for myself. It most closely approximates your shoulder size so it is suitable for different sweater styles and construction. If the difference in size between your full bust and upper bust is not significant or if your upper bust measurement is larger than your full bust measurement, use the upper bust measurement.
If your full bust measurement is significantly larger than your upper bust measurement, my advice is to use your full bust measurement. If you have a, say, 6 inch / 15 cm difference between the upper and full busts, choosing a size with 4 inches / 10 cm of positive ease for your upper bust will give you 2 inches / 5 cm negative ease across your full bust. The sweater will pull across your chest and pucker in all the wrong places. Using your full bust measurement will eliminate this problem.
One exception would be if you are making an open-fronted cardigan. It doesn’t need to close in the front, but it does need to fit well in the shoulders. In this case, go with your upper bust measurement. As I mentioned above, this measurement is the one that most closely approximates your shoulder sizes and for open-front cardigan, the fit in the shoulders is the most important thing.
Reading a schematic
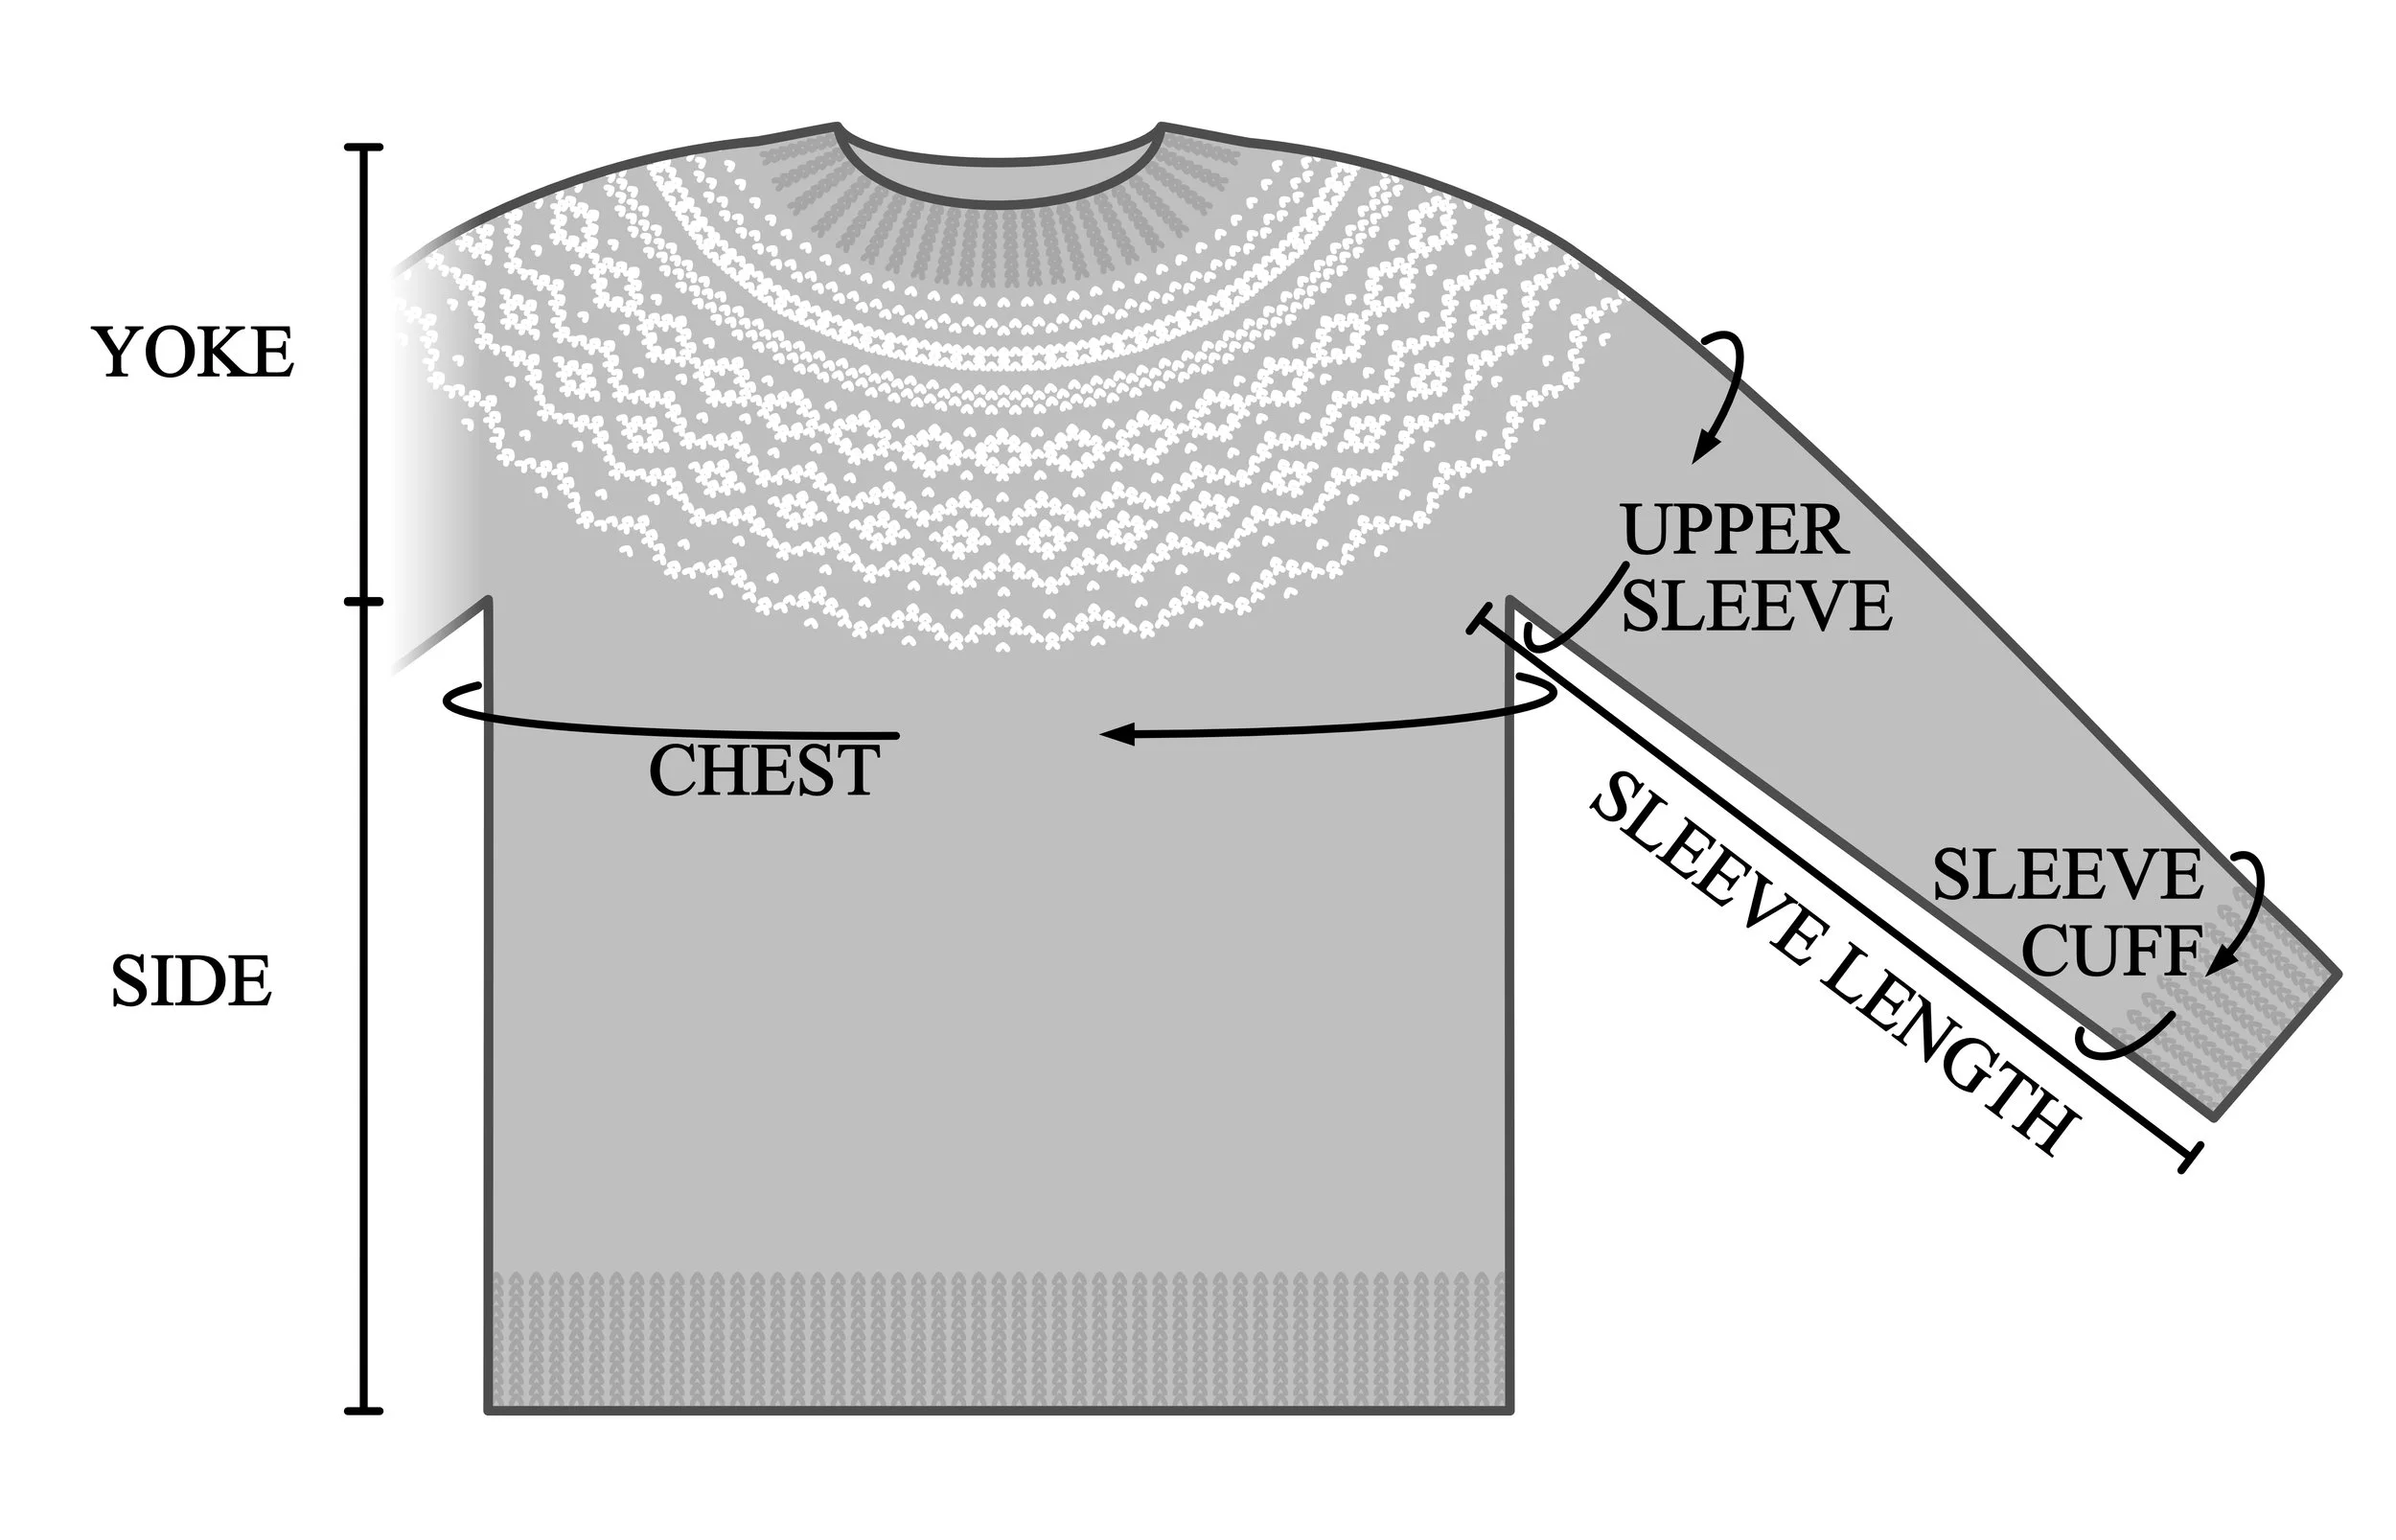
What is a schematic anyway? A schematic shows how the sweater would look if it was lying flat with all the of the measurements for all of the sizes listed. It can be a line drawing, watercolor painting, or picture made by a graphic designer. The measurements should always include the chest circumference. The other measurements listed can vary based on what the designer finds important to include as well as the construction or style of the sweater. A schematic can give you detailed information about all the sizes so that you can choose which one is best for your body.
Shown below is an example of a schematic. This one is from my Blizzard sweater.
The main measurement we use to pick our size is the chest circumference. Depending on the designer, the finished chest circumference of the sweater may be upfront on page 1 or only available in the schematic. This is because the way designers label their sizes varies. Some use size 1, size 2, etc. Some do S, M, L, etc. Others list the size as a measurement either of the finished chest circumference of the sweater or as the chest size of the person it is meant for. You want to check to see which one is used so that you can find the final chest circumference of the sweater itself.
My patterns always use the chest circumference of the finished sweater as the size. Measure yourself, add desired ease, choose the size closest to that number. It is simple and straightforward.
If the designer has listed the size as the measurement of the chest it is intended to fit, the schematic can give you the finished chest measurement of the sweater so you can choose your size the way I described above.
The chest circumference is not the only important number on the schematic, however. You can find information there on yoke depth (will the armholes fit nicely or be way too deep?), sleeve circumference (have big biceps? You might want to choose a size by the arm circumference), neck circumference (will it be too big and gape in the larger sizes?), as well as information on the lengths the sleeves and body.
Measuring your chest is fairly simple, but getting the other measurements listed on the schematic can be hard. Try taking a shirt or sweater that fits the way you want your sweater to fit, laying it flat, and taking the measurements off of it. You can then compare those measurements to the schematic to get a good idea of how the finished sweater will fit.
Please let me know if you have any questions on this topic! I’m always happy to hear from you and want to help you have a closet full of sweaters you love.
Click here for Part 3: Understanding Ease & How It Affects Fit.